In this chapter we will create an example choreography, which can be used in the subsequent chapters. If you do not wish to build the example from scratch, then you can simply read through this section referring to the choreography contained within the Examples project that comes with the pre-configured pi4soa + Eclipse distribution. Alternatively, you can download the project from the examples section on the pi4soa website.
The choreography that we will be building is located within the file examples/purchasing/PurchaseGoods.cdm
within the Examples project.
The first step is to create the choreography file. This can be achieved by selecting the New->Other... menu item from the popup menu associated with a folder in the project.

This will result in a further dialog window being displayed, which can be used to select the Choreography Description tree node, and the press the Ok button.

When the New Choreography Description wizard is displayed, update the filename from My.cdm
to PurchaseGoods.cdm. This will automatically update the Description,
Choreography Name and Target Namespace fields.

After pressing the Ok button, the choreography editor will be opened on the new
choreography description file, showing the Roles and Relationships tab. To create a role, drag
the Role item from the palette onto the editor's canvas. This will create a Role
entity called Role1 containing a Behavior entity called
Role1Behavior.
To change the name of the role, select the role entity and go to the Properties view at the bottom of the Eclipse window. This view will show the list of properties associated with the selected entity, which for a role will be its Name and Description. As the name of the role is changed, you will notice that the description is automatically updated.

Rename this first role type as Buyer, then drag two more role entities onto the canvas and call them Store and CreditAgency respectively.
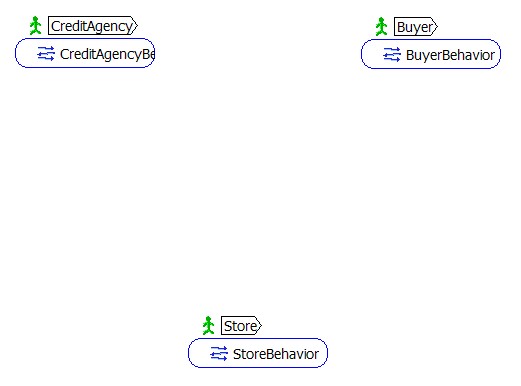
The next step is to define the relationships between the role types. This can be done by selecting the Relationship item from the palette. To establish a relationship select the from role type (i.e. the client role for the relationship) and then select the to role type (i.e. the server role for the relationship). This will create a relationship between the two roles which will be named to reflect the direction of the relationship.
Using this technique, create two relationships, one from the Buyer to the Store and the other from the Store to the CreditAgency. The end result should be:
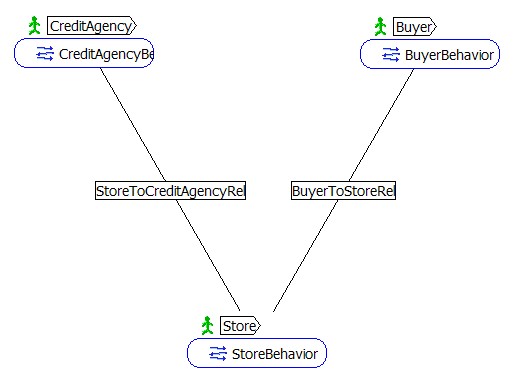
At this stage, there should only be two errors associated with the choreography:

If you double-click one of the errors, this will navigate to the ChannelType that has reported the validation problem. If you then select the Properties view, you will see the property that has the error:

This problem can be resolved by creating a token defining the type of the endpoint reference. By pressing the new, next to the Reference Token property, it will create a default token (e.g. named Token0 in the following image).

Then navigate to the Base Types tab, and expand the nodes under the Tokens node. Currently only a single child node will be defined, associated with the newly created channel type's reference token. When the new token has been selected, its properties will be displayed in the Properties view.
Firstly set the name property to "URIToken", which will result in the description field also being set. Secondly, press the new button to create an InformationType entity for the token. This will be named after the token:

The final step in resolving this issue is to define the XSD element or type associated with the newly created information type. Expand the Information Types node, and selecting the URITokenType and specifying the element or type property, such as:

Once the URIToken has been fully configured, then simply double-click on the other error, to set the Reference Token property to URIToken by selecting it from the combo box.
The next step is to define Participant Types. These represent the actual parties that will be interacting, and each ParticipantType may implement one or more RoleType.
In this specific example, we will have a ParticipantType for each of the previously defined roles. This is the default case, and therefore a participant type would have already been created per role type. This can be confirmed by selecting the Base Types tab, and expanding the Participant Types node.

Before we can begin to describe the choreography flow, and the interactions between the participants, we need to specify the information types, representing the type of the messages to be exchanged.
Drag the Information Type entry on the palette onto the Information Types node, resulting in a new child element being created called InfoType1.
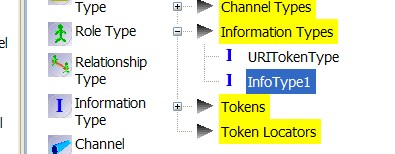
Then select the Properties view and enter the word BuyConfirmed
into the Name and Element fields. For simplicity all of the message
information types are being created to have the same Name and
Element fields, and therefore the elements are being specified without a namespace.

Once the BuyConfirmed type has been defined, repeat these steps to create information types for BuyFailed, BuyRequest, CreditCheckInvalid, CreditCheckOk and CreditCheckRequest using the same approach.
Although it would be possible to create other relevant information in the Base Types tab at this stage, we will now move to the Choreography Flows tab to start defining the behaviour associated with the process being modelled. Other type details will be created as a by-product of creating the process flow.
Once the Choreography Flows tab has been selected, choose the Interaction entity from the palette and drag it onto the navy blue think line:
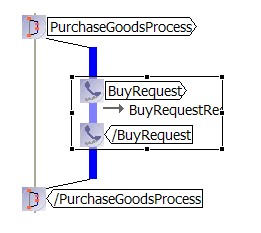
Once added to the canvas, the interaction will be the focus and therefore the Properties view will display the properties associated with the interaction. Set the Operation to "buy".
The next step is to define the channel. If the combo box is selected, you will see that no channels currently exist. Therefore by pressing the new button it will show a popup menu with the available channel types, which have automatically been created based on the role types that were the targets of the relationship links (i.e. Store and CreditAgency).

For this interaction, select the StoreChannelType, which will create a channel variable in the current choreography (called StoreChannel), and also set the Relationship property to the value relevant for the channel's target role.

Now select the ExchangeDetails element contained within the BuyRequest interaction entity. An interaction can be comprised of multiple exchange details, zero or one request exchange, zero or one normal (non-fault) respond exchange, and zero or more fault respond exchanges.
When an interaction is created, a default Request exchange will also be created. When the name of the interaction is defined, this will also update the name of the exchange. In this case, the Action combobox is set to Request, which is appropriate in this situation, but could be set to Respond for normal or fault responses, or Notify.
The final step in defining the interaction is to set the Message Type, which is achieved by selecting the BuyRequest entry from the combo box.
This same process should be repeated with a subsequent Credit Check request being sent from the Store to the CreditAgency, with the operation checkCredit on channel type CreditAgencyChannelType. The automatically create Request exchange details should be set to use the CreditCheckRequest message type.

At this point in the flow, we need to define a decision point representing the divergence between the paths for a valid and invalid credit check. This is achieved by dragging the Choice construct onto the flow, following the interaction to the credit agency. Then drag two Sequence constructs onto the Choice construct, with the descriptions "Credit Valid" and "Credit Invalid" respectively.
In each path of the choice, define two interactions containing Respond exchanges. In
one path set the interaction exchanges to CreditCheckOk and
BuyConfirmed respectively. In the other path set the interaction exchanges to
CreditCheckInvalid (with fault name CreditCheckFailed)
and BuyFailed (with fault name BuyFailed) respectively.
The fault name can be set on the Advanced tab in the Properties
view. The operation name and channel type for the interactions should be the same as for the
request that the interaction
is responding to, for example, the CreditCheckOk interaction should be on the
same channel as the CreditCheckRequest and have the operation name
checkCredit.
At this stage there should be no errors being reported for the choreography.
We now have a choreography that outlines the structure of the behaviour with the required ordering of interactions. We have also defined the message types associated with each interaction.
However, what is missing is the necessary details concerning how the messages, of those defined types, are correlated to a particular choreography session (or instance). For example, if we see two messages, a BuyRequest followed by a CreditCheckRequest, how can we be sure that these messages relate to the same choreography session, and not two separate choreography sessions (or instances).
In WS-CDL, an identity mechanism has been specified that can be used to extract information from the message contents, to enable this correlation to occur. In this example, we will only be dealing with the simplist form of this mechanism, where a single identity token is specified (called ID) to represent a primary key for the choreography, with each message providing access to this id value within their message content.
The first step in defining identity within a choreography is to create the identity token. Select the
Base Types tab, and drag a Token from the palette onto the
Tokens node. This will create a new token with name Token1.
Select the Properties view and change the name to be ID.
The Type field will currently be empty. Although you could select an existing information type, to define the type for the ID token, for now just press the new button. This will create a new information type called IDType, which can be selected and then a suitable type (e.g. xsd:string) defined.
Now that we have defined the identity token, we need to link it to each of the message types that have been exchanged in the choreography. This is achieved by creating a TokenLocator for each message type and token pair, to provide the xpath expression that will locate the token's value within the message content for the specific message type. In some situations, a particular message type may contain information related to multiple tokens, in which case multiple token locators will be defined for the same message type.
Although each locator could be created based on knowledge of the token and message types to be handled, one way to ensure that all of the appropriate locators are created is to associate the identity token with the channel types. This association is required to indicate that messages that are exchange over a particular channel type must provide a locator for the tokens associated with that channel type.
To associate an identity token with a channel type, expand the Channel Types node in the Base Types tab. Then drag the Identity element from the palette onto the CreditAgencyChanelType.
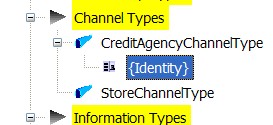
Then select the Properties view. You will see a field called Tokens.
Press the button at the end of the field to display a selection list with the list of available tokens.
Tick the checkbox next to the ID token and press the Ok
button. To change the label on the node, set a meaningful description.
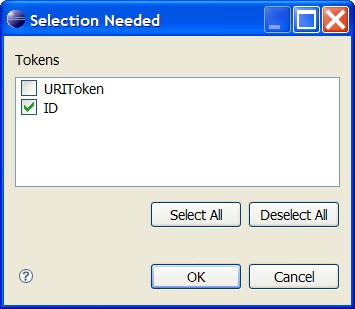
Once the identity has been defined for the channel type, and the choreography has been saved, you will notice that errors are reported to indicate which interactions have messages being sent on the channel type, but without identity information to enable the messages to be correlated to a particular choreography session.

For each of the message type and token pairs reported in the errors, create a token locator by dragging
the Token Locator item from the palette onto the Token Locators
node. When each locator has been created, set the name to an appropriate value
(e.g. CreditCheckInvalidIDLocator, which is based on a combination of the message type and token name)
and then set the Token field to ID,
Type field to the relevant message type, and finally the Expression
field to "//@id". This xpath expression will be common to all locators within this
example choreography, and is specified for simplicity. In reality, each message type may have
more specific xpath expressions to locate the information of interest.
Once the token locators have been created for the credit check interactions, then associate the ID token with the StoreChannelType channel type. Instead of dragging a new Identity element from the palette, select the ID identity entity contained within the CreditAgencyChannelType and copy it (either using the Copy menu item on the Edit menu, or using the Ctrl-C shortcut). Then select the StoreChannelType and press the Ctrl-P shortcut (or Paste menu item from the Edit menu). This will create an ID identity element for the StoreChannelType. Once the choreography has been saved, then create the token locators to fix the new set of errors that have been created.