There are two ways to install the pi4soa tool suite. These are discussed in the following sections.
The recommended approach for installing pi4soa is to use the pre-configured Eclipse installation. This approach installs a full Eclipse environment that has been pre-loaded with the relevant pi4soa plugins and the additional dependencies that are not available in a basic Eclipse installation.
The other benefit of the pre-configured Eclipse installation, is that it has a workspace pre-loaded with the choreography Examples project. This includes artefacts that will be discussed in subsequent sections of this Getting Started Guide.
To obtain the latest pre-configured Eclipse installation, go to the download page on the pi4soa sourceforge project page, located at: http://sourceforge.net/project/showfiles.php?group_id=122989.
Once the relevant version has been selected, then download the distribution that is appropriate for your operating system. Versions are available for Windows (win32), Mac (macosx) and Linux.
Once the distribution has been downloaded, then simply unpack it in your preferred location. The final step is to launch the Eclipse application, which will present a workspace with a single Examples project.
If you wish to install the pi4soa plugins into an existing Eclipse environment, then you will need to ensure that certain dependencies are resolved.
First step is to ensure the Eclipse version is appropriate. Currently pi4soa supports Ganymede (version 3.4) of Eclipse. This version is available from the Eclipse website, in the downloads section. We suggest that you download the Eclipse Classic edition.
The next step is to install the other Ganymede related plugins that are required by pi4soa. These are available by selecting the Help->Software Updates... menu item to start the update manager. Once the dialog window is displayed, select the Available Software tab.
Then expand the Ganymede top level node, and select the following child nodes,
- Graphical Editors and Frameworks
- Models and Model Development
- If BPMN export is required, then expand the SOA Development and select the BPMN Project Feature child node.
as shown in the following screenshot:
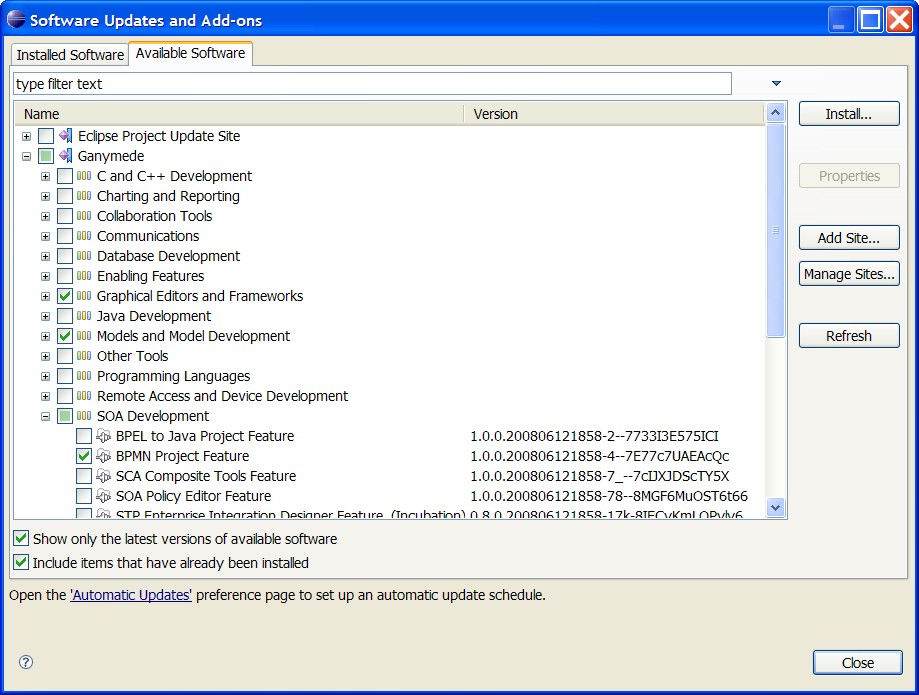
Once the relevent nodes have been selected, press the Install button to commence the installation of the plugins. Follow the instructions given by the update manager, which will eventually request that the Eclipse application be restarted. Once restarted, your Eclipse environment will have all of the appropriate dependencies, so the next step will be to install the pi4soa plugins.
Launch the Software Update Manager again, by selecting the Help->Software Updates... menu item, and then select the Available Software tab. Press the Add Site button, and then enter the URL http://pi4soa.sourceforge.net/updates, as shown in the following image.
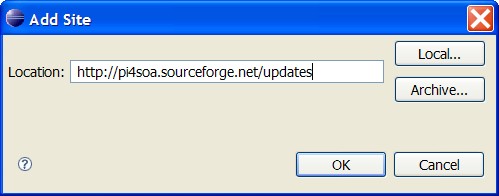
Once the top level node for the new update site has been selected, press the Install button to commence the installation of the pi4soa plugins. Follow the instructions given by the update manager, which will eventually request that the Eclipse application be restarted. Once restarted, your Eclipse environment will be fully configured.
Before proceeding with the rest of the chapters in this guide, it will be necessary to install the choreography
examples. These can be found at: http://pi4soa.wiki.sourceforge.net/examples.
Select the Choreography examples link and downloading the
pi4soa2-examples.zip file.
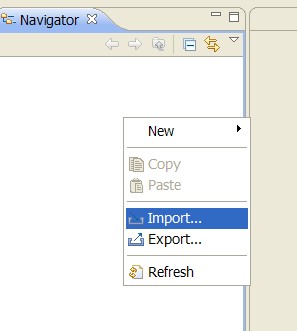
To import the example, select the Import menu item from the popup menu associated with the Eclipse Navigator on the lefthand side of the Eclipse window.
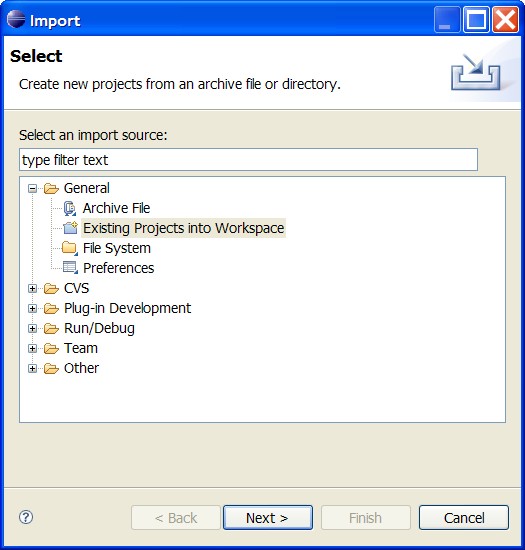
When the dialog is displayed, select the Existing Projects from Workspace entry and then press the Next button.
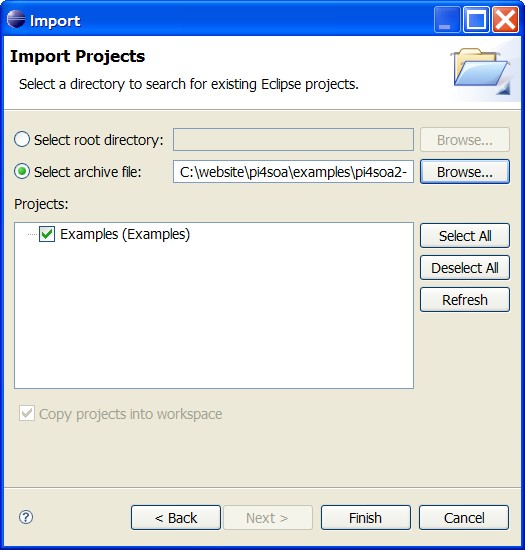
Choose the Select archive file radio button and browse to find the downloaded examples zip file. When the file is located, press the Open button and then the Finish button to import the Examples project.
Now the Eclipse environment will contain a single Examples project, ready to proceed to the next chapters of this guide.